MetaSploit攻击实例讲解------终端下PostgreSQL数据库的使用(包括kali linux 2016.2(rolling) 和 BT5),metasploitkali
配置msf连接postgresql数据库
我这里是使用kali linux 2016.2(rolling)
用过的博友们都知道,已经预安装好了PostgreSQL。
1、 postgresql启动

  /etc/init.d/postgresql start

 或者
  service postgresql start
2、切换到postgre数据库,进行配置

sudo -u postgres psql postgres (进入到postgre数据库)
alter user postgres with password 'postgres'; //改变用户postgres的密码“postgres ”
即以管理员的身份切换到postgres用户下, psql postgres 即以切换到postgres数据库下。


postgres=# alter user postgres with password 'postgres';
ALTER ROLE
postgres=# \password  postgres
输入新的密码:
再次输入:
postgres=#
注意1:’postgres ’ 这个是密码。
注意2:分号!!!! 一定要带上分号”;”。

注意3:\q:退出数据库
这里,已经进入到postgres数据库了,然后,可以通过\dt来查看,里面的表。

或者
大家也可以这样来,修改linux系统的postgres用户的密码(密码与数据库用户postgres的密码相同)
root@kali:~# sudo passwd -d postgres
passwd:密码过期信息已更改。
root@kali:~# sudo -u postgres passwd
输入新的 UNIX 密码:
重新输入新的 UNIX 密码:
passwd:已成功更新密码
3、当然大家,可以不用PostgreSQL的默认账号,自己新建。(这里我不新建了)(这一步可以跳过)
PostgreSQL数据库创建访问账号。这个zhouls是我自己取的,即创建普通用户,大家可以自己去取。
sudo -u postgres createuser zhouls

然后,切换到postgresql,进行如下配置
设定管理员密码 : \password zhouls
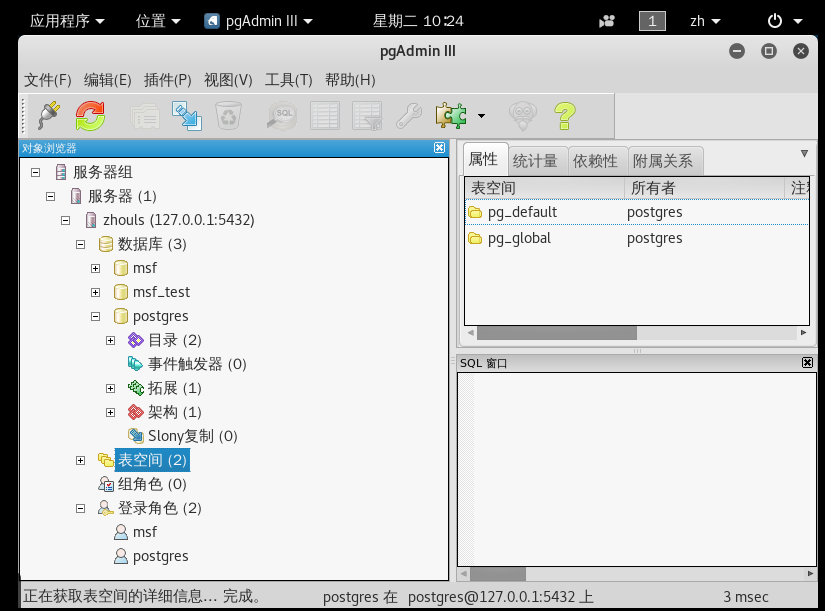
4、进入postgresql数据库的图形化界面
默认是没有的,需要我们手动安装。
apt-get install pgadmin3
如果要在Ubuntu的图形界面启动pgadmin,只需要按下键盘的windows键,在搜索中输入pgadmin,就可以查找到它,点击就可以启动。如果要方便以后使用,可以把它拖到启动器上锁定就行了。

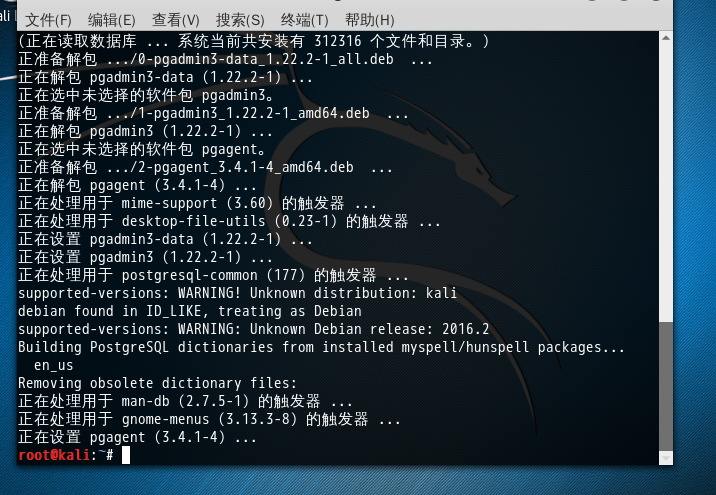
root@kali:~# apt-get install pgadmin3
正在读取软件包列表... 完成
正在分析软件包的依赖关系树
正在读取状态信息... 完成
下列软件包是自动安装的并且现在不需要了:
  libboost-atomic1.61.0 libboost-chrono1.61.0 libboost-date-time1.61.0
  libcrypto++6 libosinfo-db python-pycryptopp
使用'apt autoremove'来卸载它(它们)。
将会同时安装下列软件:
  pgadmin3-data pgagent
建议安装:
  postgresql-contrib
下列【新】软件包将被安装:
  pgadmin3 pgadmin3-data pgagent
升级了 0 个软件包,新安装了 3 个软件包,要卸载 0 个软件包,有 1728 个软件包未被升级。
需要下载 5,894 kB 的归档。
解压缩后会消耗 22.5 MB 的额外空间。
您希望继续执行吗? [Y/n] y
获取:1 http://101.110.118.46/http.kali.org/kali kali-rolling/main amd64 pgadmin3-data all 1.22.2-1 [2,560 kB]
获取:2 http://101.110.118.46/http.kali.org/kali kali-rolling/main amd64 pgadmin3 amd64 1.22.2-1 [3,268 kB]
获取:3 http://101.110.118.42/http.kali.org/kali kali-rolling/main amd64 pgagent amd64 3.4.1-4 [66.1 kB]
已下载 5,894 kB,耗时 57秒 (102 kB/s)
正在选中未选择的软件包 pgadmin3-data。
(正在读取数据库 ... 系统当前共安装有 312316 个文件和目录。)
正准备解包 .../0-pgadmin3-data_1.22.2-1_all.deb  ...
正在解包 pgadmin3-data (1.22.2-1) ...
正在选中未选择的软件包 pgadmin3。
正准备解包 .../1-pgadmin3_1.22.2-1_amd64.deb  ...
正在解包 pgadmin3 (1.22.2-1) ...
正在选中未选择的软件包 pgagent。
正准备解包 .../2-pgagent_3.4.1-4_amd64.deb  ...
正在解包 pgagent (3.4.1-4) ...
正在处理用于 mime-support (3.60) 的触发器 ...
正在处理用于 desktop-file-utils (0.23-1) 的触发器 ...
正在设置 pgadmin3-data (1.22.2-1) ...
正在设置 pgadmin3 (1.22.2-1) ...
正在处理用于 postgresql-common (177) 的触发器 ...
supported-versions: WARNING! Unknown distribution: kali
debian found in ID_LIKE, treating as Debian
supported-versions: WARNING: Unknown Debian release: 2016.2
Building PostgreSQL dictionaries from installed myspell/hunspell packages...
  en_us
Removing obsolete dictionary files:
正在处理用于 man-db (2.7.5-1) 的触发器 ...
正在处理用于 gnome-menus (3.13.3-8) 的触发器 ...
正在设置 pgagent (3.4.1-4) ...
最后把postgresql设置为开机自启
root@kali:~# update-rc.d postgresql enable
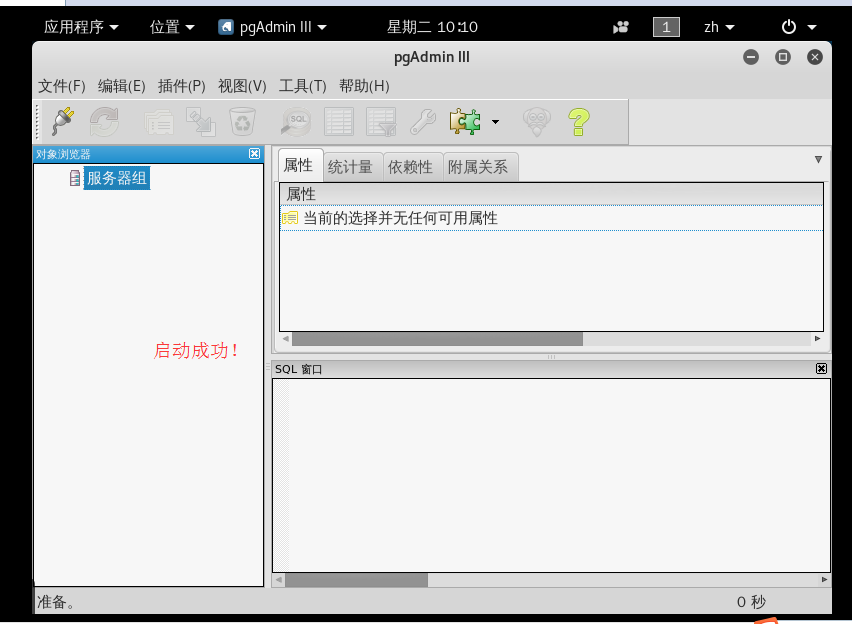
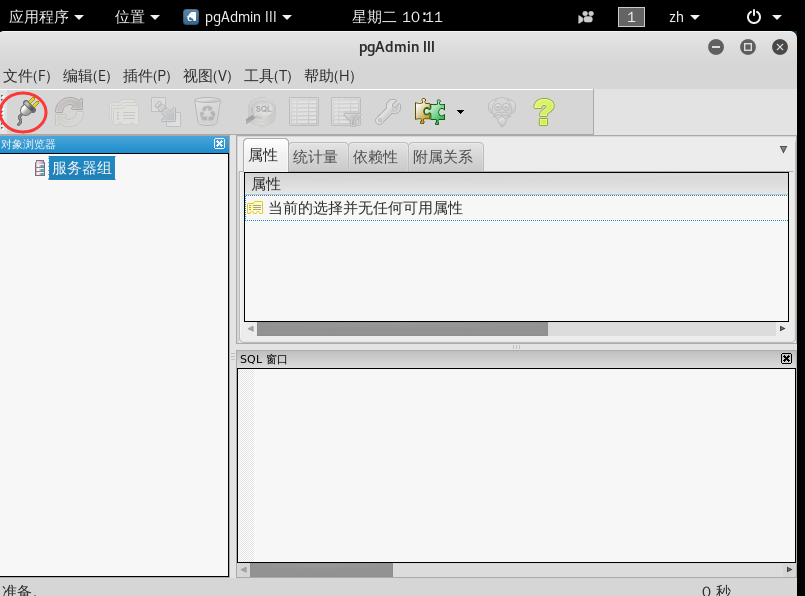
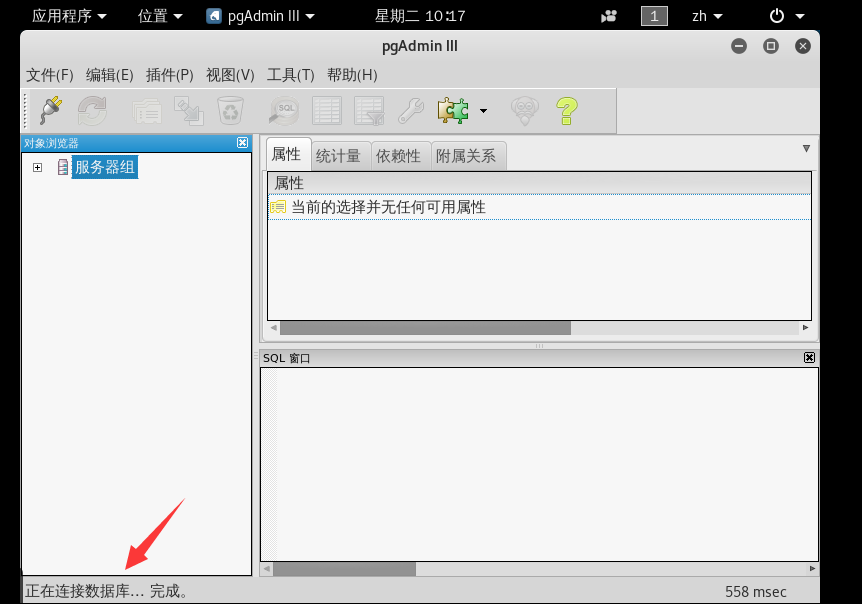
启动PostgreSQL数据库图形化管理工具


如果是
修改PostgresSQL数据库配置实现远程访问
管理PostgreSQL用户和数据库
配置自动连接
则请见
http://blog.csdn.net/xiongjun_cdn/article/details/51241083
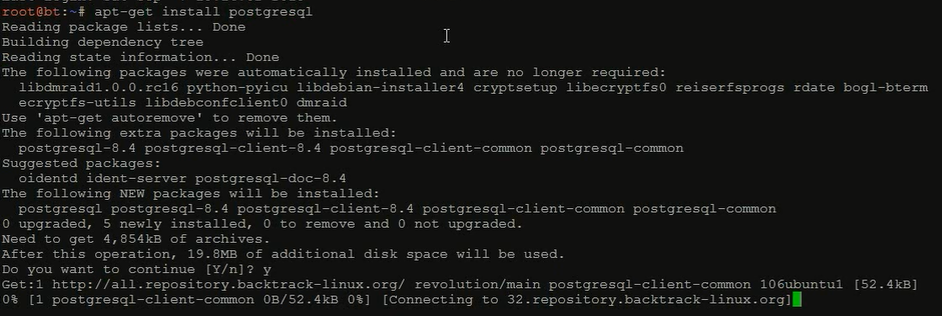
如果大家还有使用BT5的话,则需要安装PostgreSQL(现在一般不用这个BT5了)
一、PostgreSQL数据库安装与管理员密码设定
1、安装PostgreSQL数据库 : apt-get install postgresql
2、切换到postgre数据库 : sudo -u postgres psql postgres
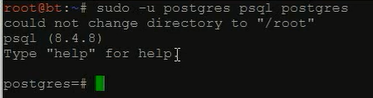
3、设定管理员密码 : \password postgres

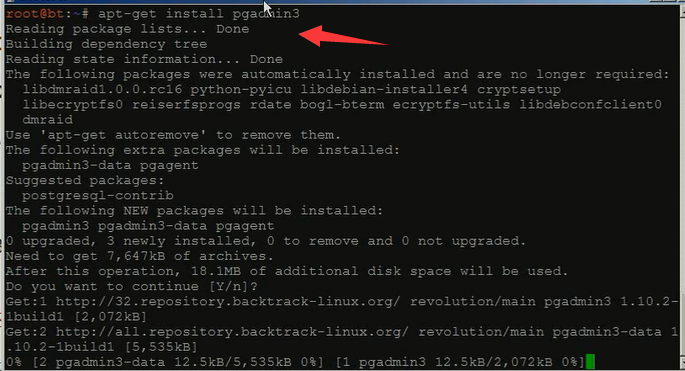
4、安装pgadmin3数据库管理程序 : apt-get install pgadmin3
Metasploit终端PostgreSQL的常用命令
查看数据库当前状态: db_status
连接数据库 : db_connect
断开数据库 : db_disconnect
工作空间命令 : workspace
大家,输入msfconsole,即可看到

root@kali:~# msfconsole


MMMMMMMMMMMMMMMMMMMMMMMMMMMMMMMMMMMMM
MMMMMMMMMMM                MMMMMMMMMM
MMMN$                           vMMMM
MMMNl  MMMMM             MMMMM  JMMMM
MMMNl  MMMMMMMN       NMMMMMMM  JMMMM
MMMNl  MMMMMMMMMNmmmNMMMMMMMMM  JMMMM
MMMNI  MMMMMMMMMMMMMMMMMMMMMMM  jMMMM
MMMNI  MMMMMMMMMMMMMMMMMMMMMMM  jMMMM
MMMNI  MMMMM   MMMMMMM   MMMMM  jMMMM
MMMNI  MMMMM   MMMMMMM   MMMMM  jMMMM
MMMNI  MMMNM   MMMMMMM   MMMMM  jMMMM
MMMNI  WMMMM   MMMMMMM   MMMM#  JMMMM
MMMMR  ?MMNM             MMMMM .dMMMM
MMMMNm `?MMM             MMMM` dMMMMM
MMMMMMN  ?MM             MM?  NMMMMMN
MMMMMMMMNe                 JMMMMMNMMM
MMMMMMMMMMNm,            eMMMMMNMMNMM
MMMMNNMNMMMMMNx        MMMMMMNMMNMMNM
MMMMMMMMNMMNMMMMm+..+MMNMMNMNMMNMMNMM
        http://metasploit.com


Easy phishing: Set up email templates, landing pages and listeners
in Metasploit Pro -- learn more on http://rapid7.com/metasploit

       =[ metasploit v4.12.41-dev                         ]
+ -- --=[ 1597 exploits - 912 auxiliary - 274 post        ]
+ -- --=[ 458 payloads - 39 encoders - 8 nops             ]
+ -- --=[ Free Metasploit Pro trial: http://r-7.co/trymsp ]

msf > help

Core Commands
=============

    Command       Description
    -------       -----------
    ?             Help menu
    advanced      Displays advanced options for one or more modules
    back          Move back from the current context
    banner        Display an awesome metasploit banner
    cd            Change the current working directory
    color         Toggle color
    connect       Communicate with a host
    edit          Edit the current module with $VISUAL or $EDITOR
    exit          Exit the console
    get           Gets the value of a context-specific variable
    getg          Gets the value of a global variable
    grep          Grep the output of another command
    help          Help menu
    info          Displays information about one or more modules
    irb           Drop into irb scripting mode
    jobs          Displays and manages jobs
    kill          Kill a job
    load          Load a framework plugin
    loadpath      Searches for and loads modules from a path
    makerc        Save commands entered since start to a file
    options       Displays global options or for one or more modules
    popm          Pops the latest module off the stack and makes it active
    previous      Sets the previously loaded module as the current module
    pushm         Pushes the active or list of modules onto the module stack
    quit          Exit the console
    reload_all    Reloads all modules from all defined module paths
    rename_job    Rename a job
    resource      Run the commands stored in a file
    route         Route traffic through a session
    save          Saves the active datastores
    search        Searches module names and descriptions
    sess          Interact with a given session
    sessions      Dump session listings and display information about sessions
    set           Sets a context-specific variable to a value
    setg          Sets a global variable to a value
    show          Displays modules of a given type, or all modules
    sleep         Do nothing for the specified number of seconds
    spool         Write console output into a file as well the screen
    threads       View and manipulate background threads
    unload        Unload a framework plugin
    unset         Unsets one or more context-specific variables
    unsetg        Unsets one or more global variables
    use           Selects a module by name
    version       Show the framework and console library version numbers


Database Backend Commands
=========================

    Command           Description
    -------           -----------
    creds             List all credentials in the database
    db_connect        Connect to an existing database
    db_disconnect     Disconnect from the current database instance
    db_export         Export a file containing the contents of the database
    db_import         Import a scan result file (filetype will be auto-detected)
    db_nmap           Executes nmap and records the output automatically
    db_rebuild_cache  Rebuilds the database-stored module cache
    db_status         Show the current database status
    hosts             List all hosts in the database
    loot              List all loot in the database
    notes             List all notes in the database
    services          List all services in the database
    vulns             List all vulnerabilities in the database
    workspace         Switch between database workspaces

msf >
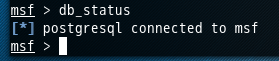
msf > db_status
[*] postgresql connected to msf
msf >
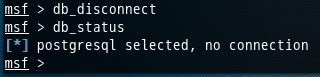
msf > db_disconnect
msf > db_status
[*] postgresql selected, no connection
msf >
创建连接数据库postgres这个在执行下面的命令,它若检测到没有这个数据库的话,则自己会自动去创建好。
对于用户和密码,其实本博文的最上面的我都早就弄好了。
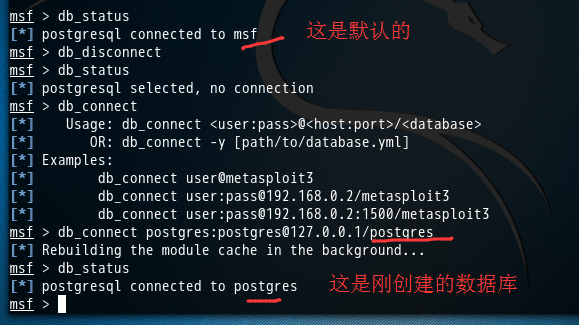
msf > db_connect
[*]    Usage: db_connect <user:pass>@<host:port>/<database>
[*]       OR: db_connect -y [path/to/database.yml]
[*] Examples:
[*]        db_connect user@metasploit3
[*]        db_connect user:pass@192.168.0.2/metasploit3
[*]        db_connect user:pass@192.168.0.2:1500/metasploit3
msf > db_connect postgres:postgres@127.0.0.1/postgres
[*] Rebuilding the module cache in the background...
msf > db_status
[*] postgresql connected to postgres
msf >
然后,


msf > workspace
  default
  001
* 002
msf > workspace 001
[*] Workspace: 001
msf >
成功链接到我们刚自定义创建好的数据库postgres后,可以用db_nmap命令,这个命令能够在MSF终端中运行db_nmap,并自动将扫描后的结果,存储到对应的数据库下的工作空间下。(我这里是存储在自定义数据库postgres的工作空间001下)
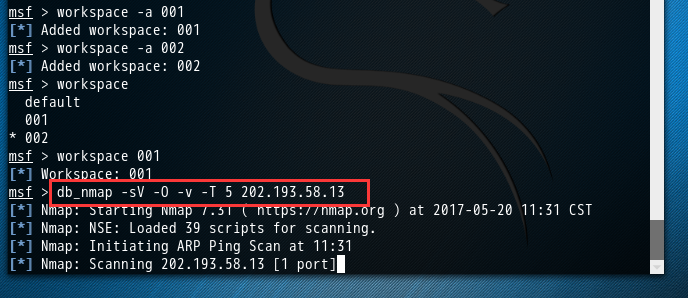
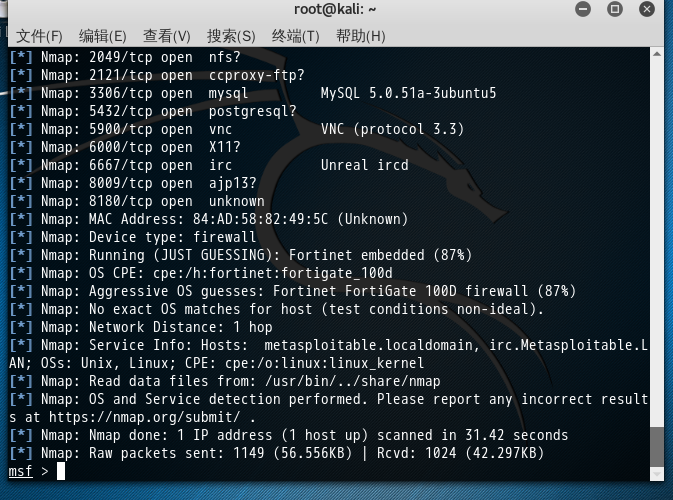
msf > workspace 001
[*] Workspace: 001
msf > db_nmap -sV -O -v -T 5 202.193.58.13
[*] Nmap: Starting Nmap 7.31 ( https://nmap.org ) at 2017-05-20 11:31 CST
[*] Nmap: NSE: Loaded 39 scripts for scanning.
[*] Nmap: Initiating ARP Ping Scan at 11:31
[*] Nmap: Scanning 202.193.58.13 [1 port]
[*] Nmap: Completed ARP Ping Scan at 11:31, 0.01s elapsed (1 total hosts)
[*] Nmap: Initiating Parallel DNS resolution of 1 host. at 11:31
[*] Nmap: Completed Parallel DNS resolution of 1 host. at 11:31, 0.02s elapsed
[*] Nmap: Initiating SYN Stealth Scan at 11:31
[*] Nmap: Scanning 13.58.193.202.in-addr.arpa (202.193.58.13) [1000 ports]
[*] Nmap: Discovered open port 139/tcp on 202.193.58.13
[*] Nmap: Discovered open port 22/tcp on 202.193.58.13
[*] Nmap: Discovered open port 21/tcp on 202.193.58.13
[*] Nmap: Discovered open port 445/tcp on 202.193.58.13
[*] Nmap: Discovered open port 23/tcp on 202.193.58.13
[*] Nmap: Discovered open port 80/tcp on 202.193.58.13
[*] Nmap: Discovered open port 5900/tcp on 202.193.58.13
[*] Nmap: Discovered open port 3306/tcp on 202.193.58.13
[*] Nmap: Discovered open port 25/tcp on 202.193.58.13
[*] Nmap: Discovered open port 53/tcp on 202.193.58.13
[*] Nmap: Discovered open port 111/tcp on 202.193.58.13
[*] Nmap: Discovered open port 8180/tcp on 202.193.58.13
[*] Nmap: Discovered open port 5432/tcp on 202.193.58.13
[*] Nmap: Discovered open port 512/tcp on 202.193.58.13
[*] Nmap: Discovered open port 8009/tcp on 202.193.58.13
[*] Nmap: Discovered open port 514/tcp on 202.193.58.13
[*] Nmap: Discovered open port 2121/tcp on 202.193.58.13
[*] Nmap: Discovered open port 6000/tcp on 202.193.58.13
[*] Nmap: Discovered open port 6667/tcp on 202.193.58.13
[*] Nmap: Discovered open port 513/tcp on 202.193.58.13
[*] Nmap: Discovered open port 1099/tcp on 202.193.58.13
[*] Nmap: Discovered open port 2049/tcp on 202.193.58.13
[*] Nmap: Discovered open port 1524/tcp on 202.193.58.13
[*] Nmap: Completed SYN Stealth Scan at 11:31, 0.99s elapsed (1000 total ports)
[*] Nmap: Initiating Service scan at 11:31
[*] Nmap: Scanning 23 services on 13.58.193.202.in-addr.arpa (202.193.58.13)
[*] Nmap: Completed Service scan at 11:32, 16.06s elapsed (23 services on 1 host)
[*] Nmap: Initiating OS detection (try #1) against 13.58.193.202.in-addr.arpa (202.193.58.13)
[*] Nmap: Retrying OS detection (try #2) against 13.58.193.202.in-addr.arpa (202.193.58.13)
[*] Nmap: NSE: Script scanning 202.193.58.13.
[*] Nmap: Initiating NSE at 11:32
[*] Nmap: Completed NSE at 11:32, 2.43s elapsed
[*] Nmap: Initiating NSE at 11:32
[*] Nmap: Completed NSE at 11:32, 1.13s elapsed
[*] Nmap: Nmap scan report for 13.58.193.202.in-addr.arpa (202.193.58.13)
[*] Nmap: Host is up (0.0022s latency).
[*] Nmap: Not shown: 977 closed ports
[*] Nmap: PORT     STATE SERVICE       VERSION
[*] Nmap: 21/tcp   open  ftp           vsftpd 2.3.4
[*] Nmap: 22/tcp   open  ssh           OpenSSH 4.7p1 Debian 8ubuntu1 (protocol 2.0)
[*] Nmap: 23/tcp   open  telnet        Linux telnetd
[*] Nmap: 25/tcp   open  smtp          Postfix smtpd
[*] Nmap: 53/tcp   open  domain?
[*] Nmap: 80/tcp   open  http?
[*] Nmap: 111/tcp  open  rpcbind?
[*] Nmap: 139/tcp  open  netbios-ssn?
[*] Nmap: 445/tcp  open  microsoft-ds?
[*] Nmap: 512/tcp  open  exec          netkit-rsh rexecd
[*] Nmap: 513/tcp  open  login?
[*] Nmap: 514/tcp  open  shell         Netkit rshd
[*] Nmap: 1099/tcp open  rmiregistry?
[*] Nmap: 1524/tcp open  shell         Metasploitable root shell
[*] Nmap: 2049/tcp open  nfs?
[*] Nmap: 2121/tcp open  ccproxy-ftp?
[*] Nmap: 3306/tcp open  mysql         MySQL 5.0.51a-3ubuntu5
[*] Nmap: 5432/tcp open  postgresql?
[*] Nmap: 5900/tcp open  vnc           VNC (protocol 3.3)
[*] Nmap: 6000/tcp open  X11?
[*] Nmap: 6667/tcp open  irc           Unreal ircd
[*] Nmap: 8009/tcp open  ajp13?
[*] Nmap: 8180/tcp open  unknown
[*] Nmap: MAC Address: 84:AD:58:82:49:5C (Unknown)
[*] Nmap: Device type: firewall
[*] Nmap: Running (JUST GUESSING): Fortinet embedded (87%)
[*] Nmap: OS CPE: cpe:/h:fortinet:fortigate_100d
[*] Nmap: Aggressive OS guesses: Fortinet FortiGate 100D firewall (87%)
[*] Nmap: No exact OS matches for host (test conditions non-ideal).
[*] Nmap: Network Distance: 1 hop
[*] Nmap: Service Info: Hosts:  metasploitable.localdomain, irc.Metasploitable.LAN; OSs: Unix, Linux; CPE: cpe:/o:linux:linux_kernel
[*] Nmap: Read data files from: /usr/bin/../share/nmap
[*] Nmap: OS and Service detection performed. Please report any incorrect results at https://nmap.org/submit/ .
[*] Nmap: Nmap done: 1 IP address (1 host up) scanned in 31.42 seconds
[*] Nmap: Raw packets sent: 1149 (56.556KB) | Rcvd: 1024 (42.297KB)
msf >
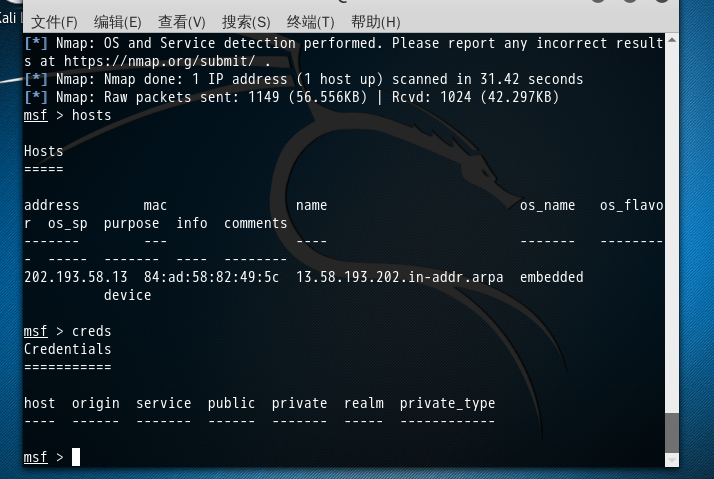
msf > hosts

Hosts
=====

address        mac                name                        os_name   os_flavor  os_sp  purpose  info  comments
-------        ---                ----                        -------   ---------  -----  -------  ----  --------
202.193.58.13  84:ad:58:82:49:5c  13.58.193.202.in-addr.arpa  embedded                    device

msf > creds
Credentials
===========

host  origin  service  public  private  realm  private_type
----  ------  -------  ------  -------  -----  ------------

msf >
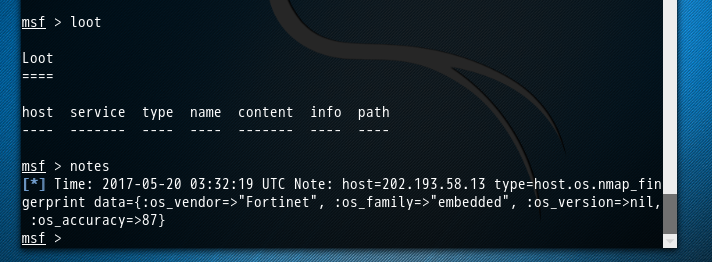
msf > loot

Loot
====

host  service  type  name  content  info  path
----  -------  ----  ----  -------  ----  ----

msf > notes
[*] Time: 2017-05-20 03:32:19 UTC Note: host=202.193.58.13 type=host.os.nmap_fingerprint data={:os_vendor=>"Fortinet", :os_family=>"embedded", :os_version=>nil, :os_accuracy=>87}
msf >
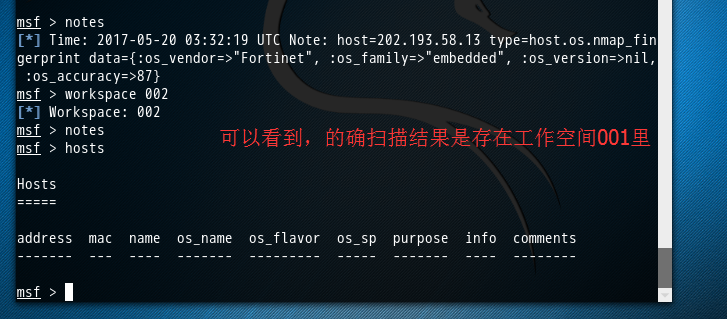
msf > notes
[*] Time: 2017-05-20 03:32:19 UTC Note: host=202.193.58.13 type=host.os.nmap_fingerprint data={:os_vendor=>"Fortinet", :os_family=>"embedded", :os_version=>nil, :os_accuracy=>87}
msf > workspace 002
[*] Workspace: 002
msf > notes
msf > hosts

Hosts
=====

address  mac  name  os_name  os_flavor  os_sp  purpose  info  comments
-------  ---  ----  -------  ---------  -----  -------  ----  --------

msf >
为什么要这么做?
答: 方便我们将扫描不同的目标或目标的不同段,进行归类。为了更好的后续工作!
本文转自大数据躺过的坑博客园博客,原文链接:http://www.cnblogs.com/zlslch/p/6880739.html,如需转载请自行联系原作者